

How To Set Up Your Nintendo Switch Lite
UPDATE, 12/21: Nintendo is warning of a server overload this Christmas, so be sure to set up your panel early.
Do you need a little assist setting up a new Nintendo Switch, Nintendo Switch Lite or Nintendo Switch OLED console? (If y'all're still trying to find one, learn where to purchase the Nintendo Switch online.)
Perchance your Switch is a gift for a child and you want to get whatever boring setup process out of the way for them to get-go playing as before long as possible. Or perhaps you want to read ahead to see what the setup process looks like before your system arrives. Whatever your situation, nosotros've got you covered.
In this how-to, we'll go over the initial setup process and so you'll know what you lot need to do and what to expect to assistance become to the games quicker.
What comes in the Nintendo Switch box
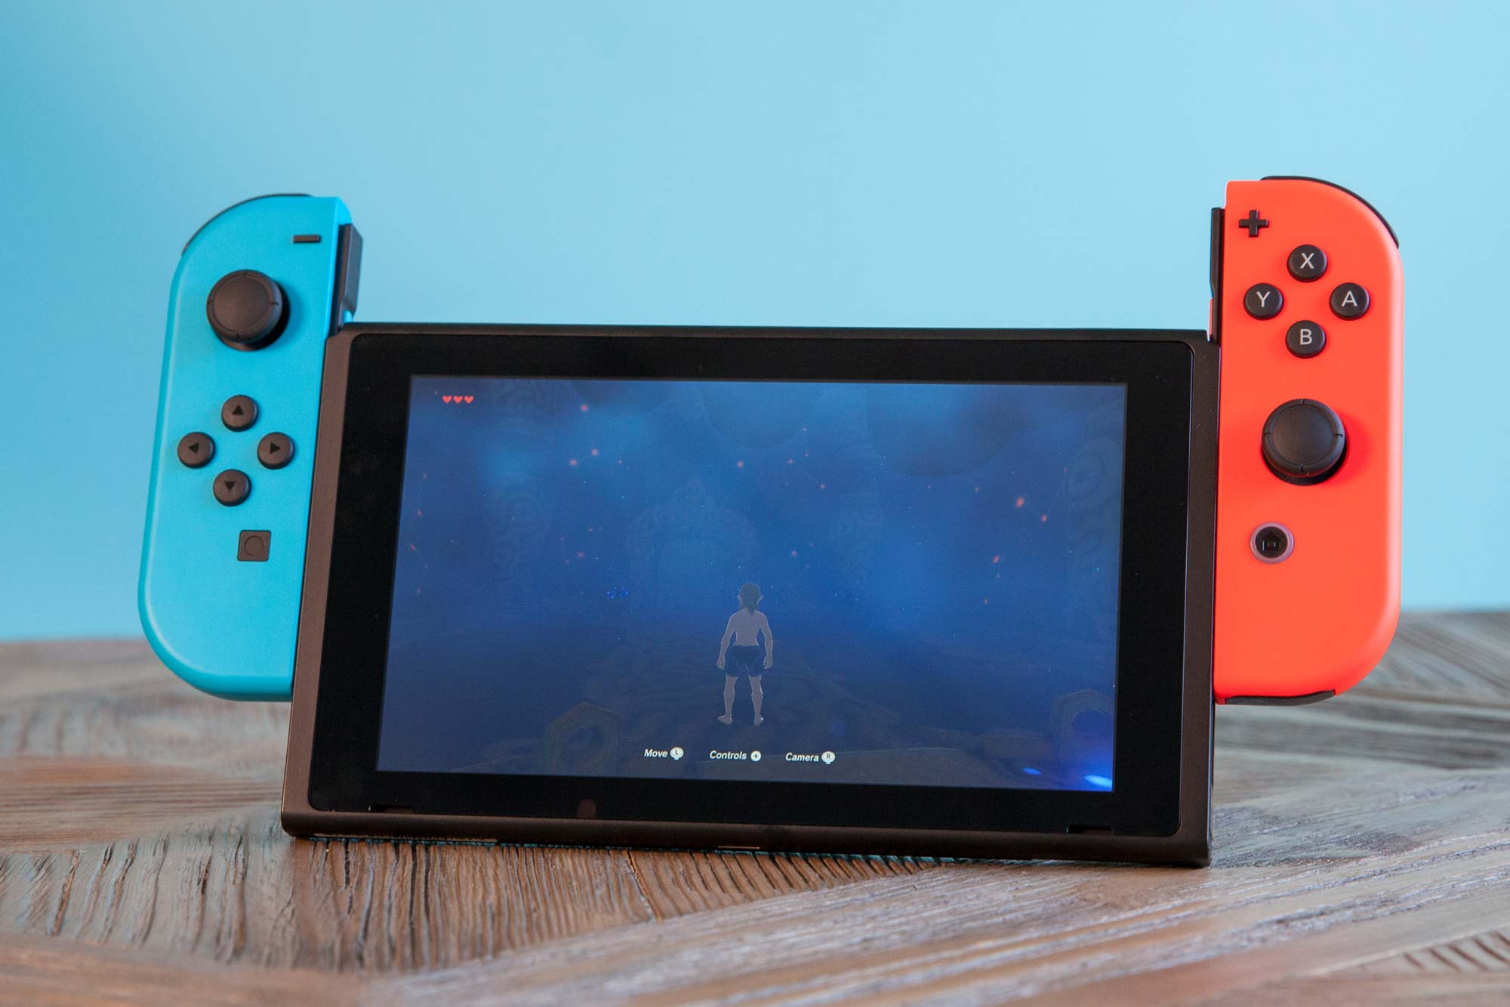
In the box you'll discover the Switch console, which is a slim tablet device, and ii small Joy-Con controllers. Also included is the console dock, an AC power cable, an HDMI cable, two Joy-Con straps and a Joy-Con Grip.
The Joy-Con controllers tin slot onto the sides of the Switch panel or into the Joy-Con grip, giving you some options of how to play. The Joy-Con straps are designed for sliding onto the sides of each Joy-Con controller for games that use them independently. The Switch console can also exist slotted into the dock for employ with a TV.
You can perform first-time system setup with or without a Goggle box, but the first steps will be done using only the console. Simply turn the system on with the power button located along the top border of the console.
How to Gear up Up Your Switch
ane. Adhere the Joy-Con controllers. The screen will indicate which Joy-Con goes on which side, but even if y'all try it shouldn't be possible to put them on the wrong manner around. Minus goes on the left, Plus goes on the right.
2. Select your linguistic communication and region.
iii. Connect to a wireless network. If you're in range and know the proper name and countersign of your network, you can connect to it now or press X to connect to it later on.
4. Cull your time zone.
5. Connect to your Idiot box. Y'all can skip this footstep if you lot wish, but if yous proceed y'all'll be asked to disconnect your Joy-Con controllers and hook up your Switch dock to your TV. Our guide to connecting a Switch to a TV will tell you exactly how to become that done.
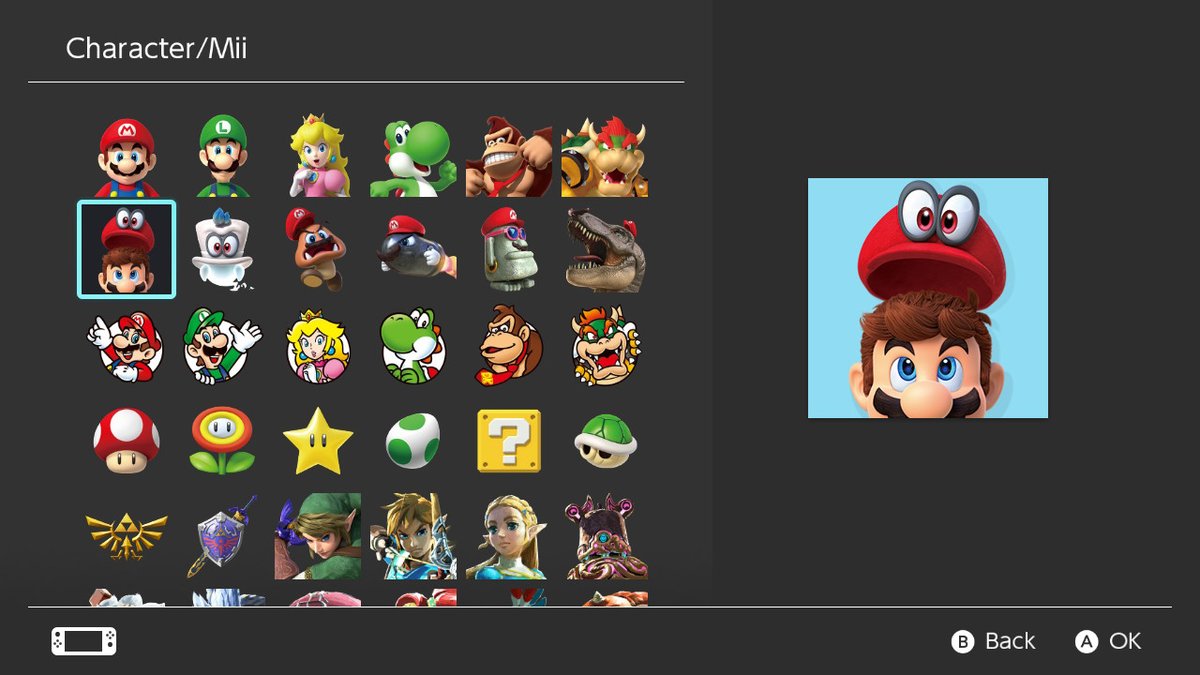
six. Choose an icon and nickname. The icon and name will be part of your public-facing contour for online friends and to distinguish yourself from other users on the aforementioned Switch. Names can only exist 10 characters long, and 7 other profiles can exist assigned to a single Switch. You can create the other profiles now or skip to the next step.
7. Ready Parental Controls. If the console will be used by a child, you can monitor their play time, restrict their access to sure features and receive remote notification on your smart device. Check out our Parental Controls guide for pace-by-step directions on how to gear up this up. After this step, you'll be brought to the home screen.
8. Connect boosted controllers. Once on the home screen you can now sync any additional controllers you lot may take. If you accept additional Joy-Con controllers, simply slotting them onto the Switch console will automatically sync them. Alternatively, yous tin can navigate to the Controllers menu on the bottom of the screen and choose Pair New Controllers, to add boosted Joy-Con or Pro Controllers. Printing the Sync push along the flat border of the Joy-Con or on the top of a Pro Controller to pair the devices to your Switch. Upwardly to 4 controller configurations tin be paired at a time.
ix. Cull a wired network connectedness. If you are unable to connect to a wireless network or if yous prefer a wired connectedness, you can cull to apply a wired LAN adapter instead of Wi-Fi. In the Organisation Settings menu, choose the Internet tab and so choose Wired Connectedness to have your organization recognize an ethernet cable. LAN adapters are sold separately and apply a USB plug which can be inserted in any of Switch'south 3 available USB ports.
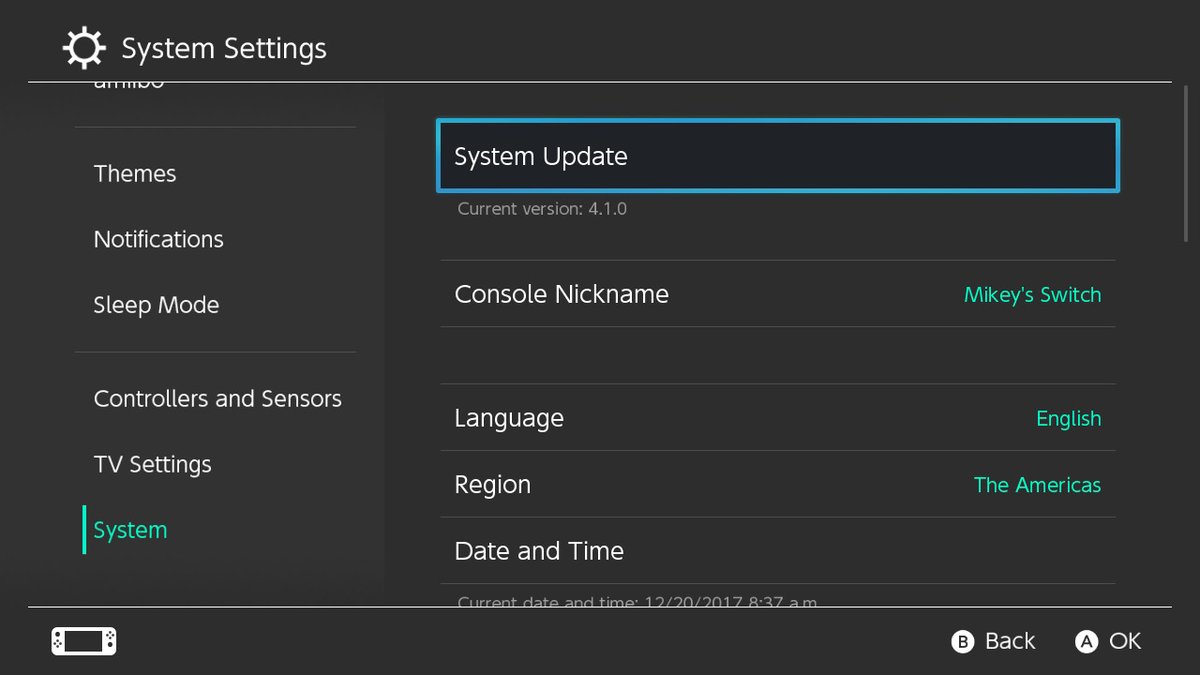
10. Perform a organization update. Before you tin can do things similar admission the eShop or play games with online features, y'all'll need to download and install the latest system firmware. If yous're already connected to the internet, you can open the due east-shop or navigate to the System Settings menu and curl to the very bottom System tab to prompt an update check.
11. Create or sign in to a Nintendo Business relationship. If yous want to take admission to online features the Switch volition need to be linked to a Nintendo Account, which needs to be created through a PC or smart device at this web address, and cannot be created on the organization.

How To Set Up Your Nintendo Switch Lite,
Source: https://www.tomsguide.com/us/how-to-set-up-nintendo-switch,news-26280.html
Posted by: ramoshisabought.blogspot.com
0 Response to "How To Set Up Your Nintendo Switch Lite"
Post a Comment